Site tracking allows you to share behavioral information from your website to your automations in ActiveCampaign. For example, if one of your contacts visits a special page of your site where you have a specific product or a form, ActiveCampaign will pull that data so you have it available to execute actions within your automations. This functionality is amazing because you can have data of what your contacts are interested in, as well as know what are the strengths and weaknesses of your marketing strategy.
In this tutorial, you are going to learn how to set the site tracking of your site within ActiveCampaign, as well as how we can create an automation once configured.
Step 1
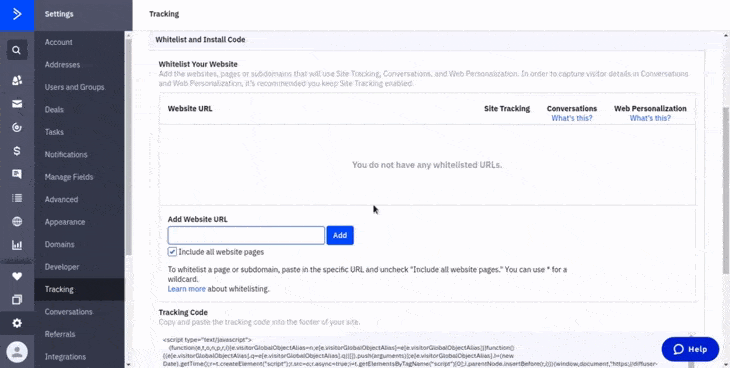
1.- Inside your ActiveCampaign dashboard, click on the “Settings” tab in the left menu.
2.-Then click on the “Tracking” tab in the settings menu.
3.- Toggle the “Enable” option to enable site tracking.
4.- Paste your website URL inside the “Add Website URL” input.
5.- Tick the “Include all website pages” option to track all of the pages of your website.
6.- Click “Add”.
Step 2
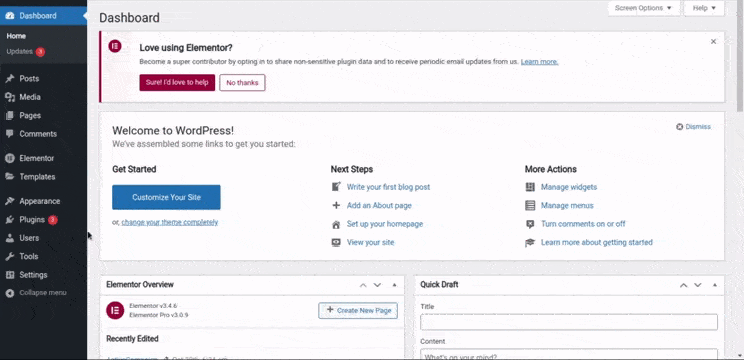
Next, you have a javascript code you need to copy and paste into your website. In this example, we are going to use a WordPress site.
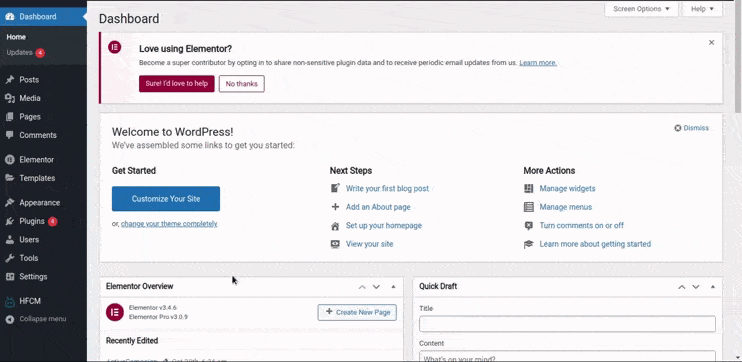
1.- In your WordPress dashboard click on the “Plugins” tab at the left menu.
2.- Search for the plugin “Header Footer Code Manager”.
3.- Click “Install Now”.
4.- Once installed, click “Activate” so you enable the plugin.
1.- Go to your HCFM menu by clicking on the “HFCM” tab on the left menu.
2.- Click “Add New” to add a new footer snippet.
3.- Give a name for your new snippet. Choose “Javascript” as the type.
4.- Select “Site Wide” to load your script on all the web pages.
5.-Select “Footer” as the location for the snippet.
6.- Select “Show on all devices” and the status as “Active”.
7.- Copy and paste your ActiveCampaign code into the “Snippet/Code” box
8.- Click “Save”.
Step 3
Now you can start adding automations based on the site tracking of your web pages. In this case, we are going to start a basic automation so when users from your list visit your website, a tag is added to them.
1.- Click on the “automations” tab in your ActiveCampaign dashboard.
2.- Click on “Create an automation”.
3.- Select “Start from scratch” to start a new automation from scratch. Click “Continue”.
4.-Search for the “Web site is visited” trigger.
5.- Select your “Web page URL”. Add a “*” after the slash so the trigger applies for all the pages of your website.
6.- Select runs “Once” so the automation will run one time only.
7.-Click “Add Start”.
8.- Look for the “Contacts” actions. Select the “Add a tag”.
9.- In this example, we are going to add a special tag for those users who visited our website. Be sure to add all of the actions you need in your workflow.
10.- When you are finished make sure to click the “Active” button at the top of your screen to enable your automation.
That’s how you start tracking your website actions using ActiveCampaign. You can start storing all the important actions your contacts do while on your site. Remember that if you have any doubts or issues related to your ActiveCampaign and its site tracking tool, we offer ourActiveCampaign managed service that is handled by our team of experts. It includes 24/7 Support, fully automated email sequences, customized branded emails, and custom API syncs. Don’t hesitate to contact us if you are interested so we can arrange a call.
 IN VALENCIA AND SAN DIEGO