Would you like to integrate ActiveCampaign directly into Gmail?
ActiveCampaign’s Google extension is the super easy-to-use tool that will synchronize your ActiveCamapigns account natively into your Gmail inbox. It will get you access to your contacts and deals and also be able to track emails sent from Gmail. This article will show you how to use the add-on and its benefits for your marketing campaigns.

What is ActiveCampaign?
ActiveCampaign is a powerful cloud app that lets you put your email marketing campaigns on autopilot. It enables you to automate most of your sales workflows through a powerful automation builder and an integrated CRM. You can also be in complete control of your contacts by using tracking tools nested inside your emails.

Why use Google's ActiveCampaign extension?
ActiveCampaign’s Google extension is a helpful tool to merge your Gmail account directly with your ActiveCampaign, letting you synchronize data straight from the marketing software. Let’s say you want to look for some contact information when you’re about to send an email; you can easily search for it without leaving your inbox. It also has other nifty features, like enabling you to track emails sent directly from Gmail. Using the add-on gives you access to contacts and deals history, letting you make the right decision when you’re just about to contact them.

What do I need to install Google's ActiveCampaign extension?
Google’s ActiveCampaign is very easy to use. You need to have your ActiveCampaign credentials in hand, a Google chrome installation with the most recent version, and a Gmail account.

How to install and use Google's ActiveCampaign extension?
Installing and using Google’s ActiveCampaign extension is very easy. Remember that you need to have an active ActiveCampaign subscription and a Gmail account. Follow the next steps to install and start using the ActiveCampaign’s extension:
Installing the extension
1.- Open your chrome browser. Consider you can’t install the extension on a private or guest session.
2.- Got to the extension page.
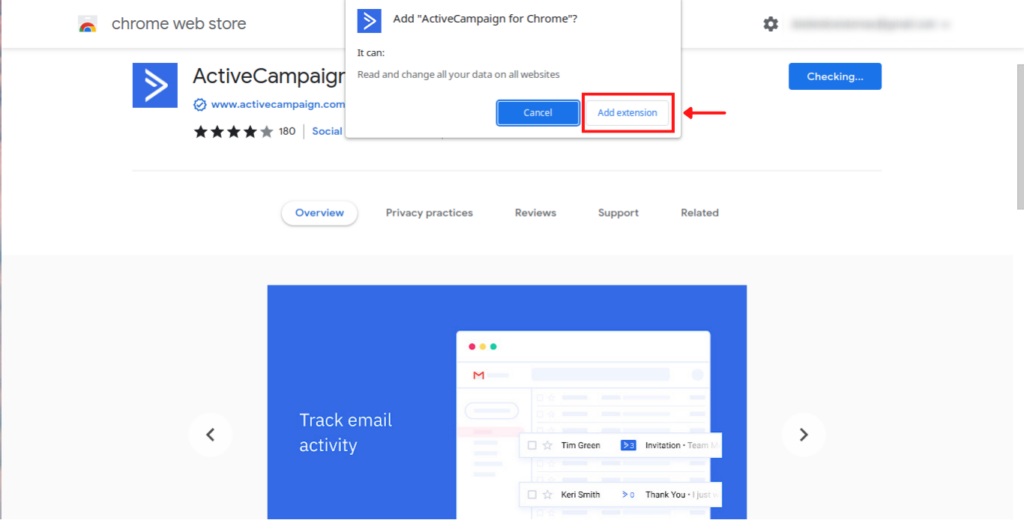
3.- Click on “Add to Chrome”.
4.- It will ask you for some permissions the app needs to operate. Click on “Add extension” to continue.

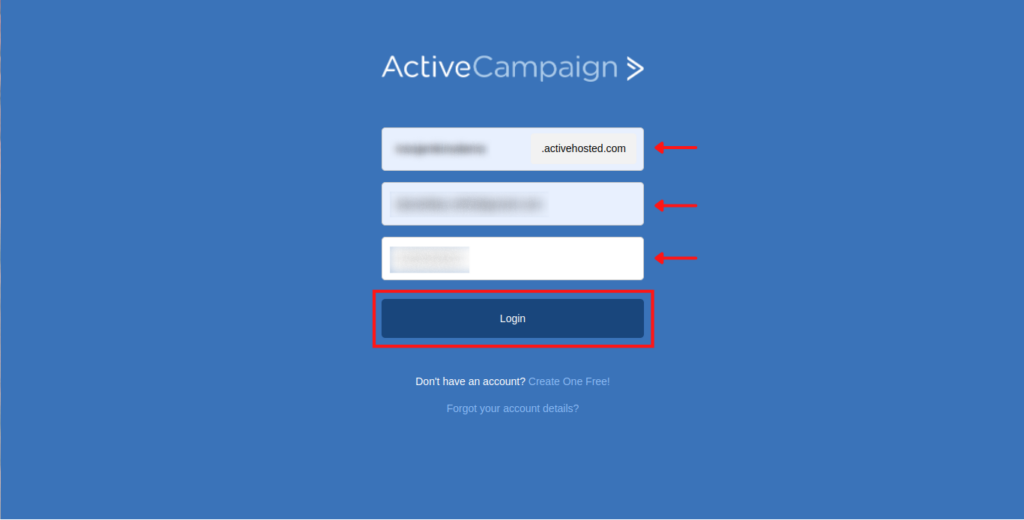
5.- It’ll immediately redirect you to ActiveCampaign’s login page. Provide your credentials and click “Login”.

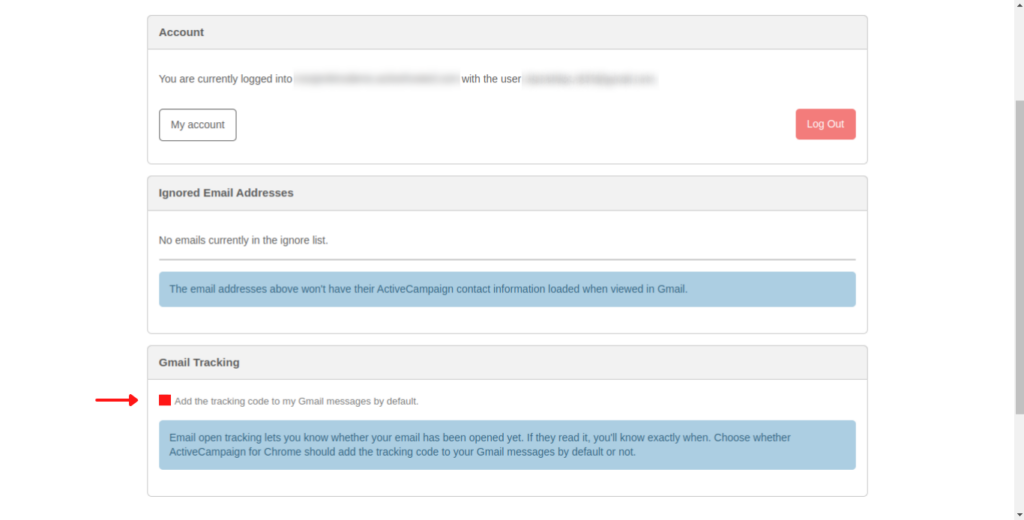
6.- After the extension is enabled, you’ll see the setting page. You can add some email addresses to ignore, so the extension doesn’t display their information.
7.- You can enable Gmail tracking to add tracking code to all messages sent by Gmail.

Using the extension
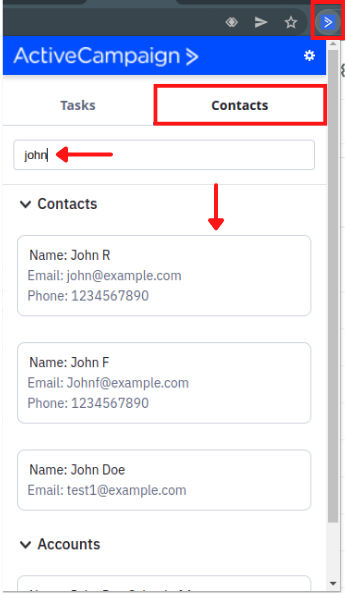
8.- You can access your ActiveCampaign information when logged in to your Gmail account by clicking on the ActiveCampaign icon.

9.- You can also enable the tracking code when composing an email by clicking on the ActiveCampaign icon.

Need more Help?
We hope you’ve found this tutorial helpful for installing and using Google’s ActiveCampaign extension. Remember that at DigitalME, we can help you with anything related to your ActiveCampaign setup and your marketing strategies in general. We provide consultancy and managed services for marketing and sales automation. Click on the “Get in touch” button and complete the contact form if you’re interested. We’ll get back to you as soon as possible.


 IN VALENCIA AND SAN DIEGO